Restoring UMP Snapshot
This section describes how to create a new disk on the UMP VM and to restore the snapshot image created in Backing up UMP-365 – Disk Snapshot to this disk (create a new VHD image for this disk).
| ➢ | Do the following: |
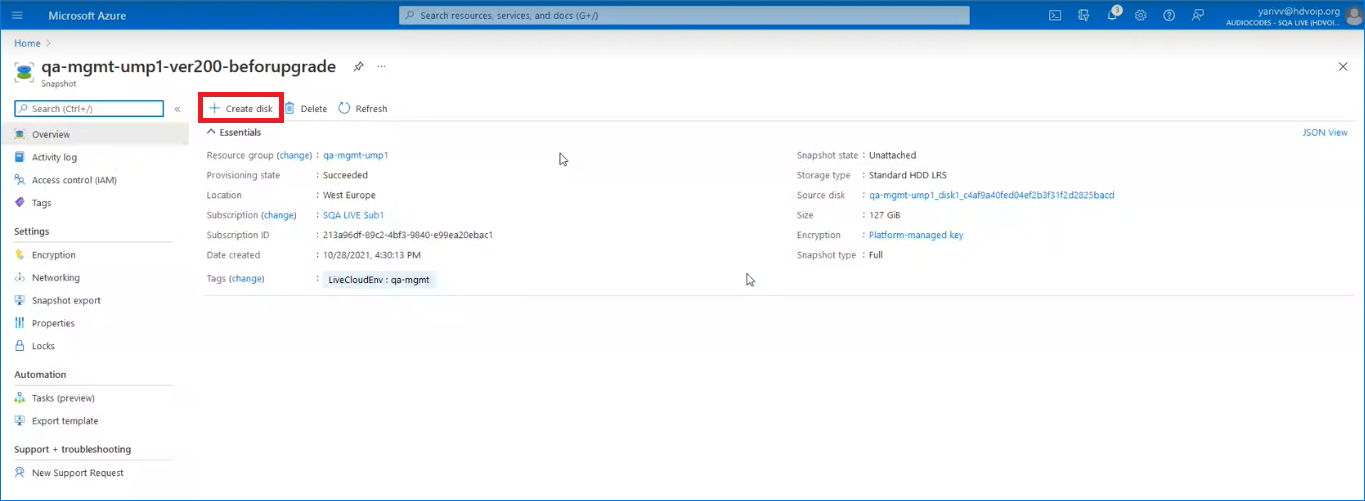
| 1. | Open the new snapshot that you created in Backing up UMP-365 – Disk Snapshot and click Create Disk. |
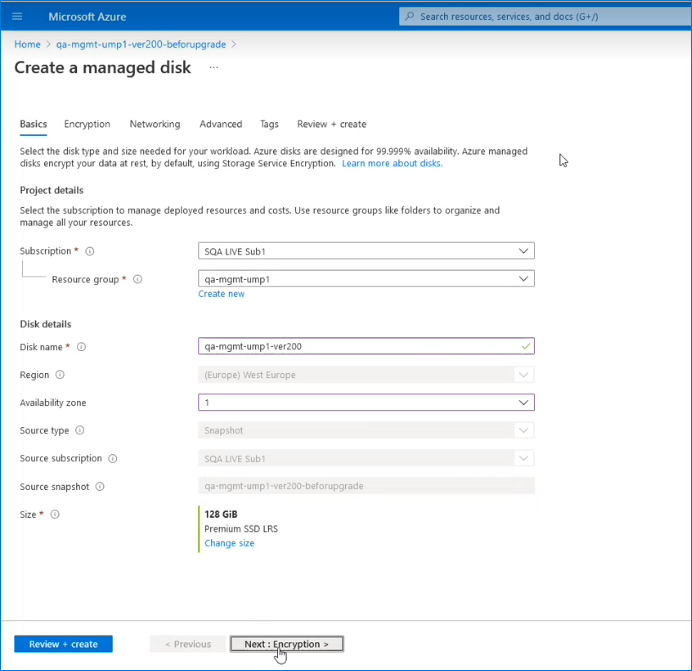
| 2. | Enter the details of the disk to create a new VHD image. |
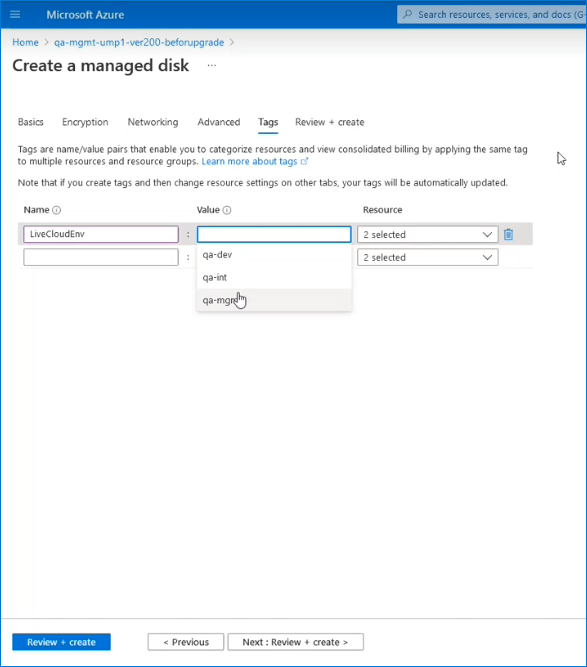
| 3. | Select the Tags tab to optionally define tags for the new disk. |
| 4. | Click Review + create. |
| 5. | Navigate to the UMP Virtual Machine. |

| 6. | In the portal search field, type Swap OS Disk. |
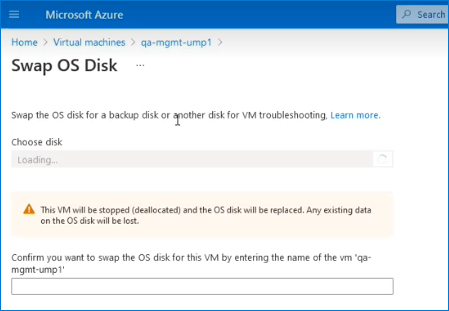
| 7. | From the Choose Disk drop-down list, choose the snapshot that you created in Backing up UMP-365 – Disk Snapshot (in this example “qa-mgmt-ump1-ver200”). |
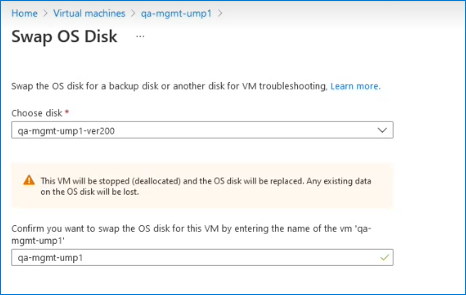
| 8. | Enter the UMP VM name (in this example “qa-mgmt-ump1”). |
| 9. | When the Swap Disk action completes, open the UMP interface and check that all customer data is displayed. |